

How to Bend Aluminum Composite Panel?
2025-11-11How to Bend Aluminum Composite Panel: Master the Professional Technique
Aluminum composite panel (ACP) bending is an essential skill for architects, fabricators, and installers creating modern building facades, signage, and interior designs. When executed correctly, this process produces clean, sharp bends that enhance both aesthetics and durability. This comprehensive guide reveals the industry-standard dry bending method that professionals use to achieve flawless results.
Essential Tools for Professional ACP Bending
1. Core Cutting Equipment
-
Grooving Router: Hand-held router (500W minimum) with V-groove bits
-
Bit Selection: 30°/60°/90° V-shaped carbide bits
-
Pro Tip: Always use sharp bits—dull bits tear the core material, compromising bend quality
2. Precision Measuring Tools
-
Steel tape measure (1mm accuracy)
-
Engineering square (30cm/50cm)
-
Waterproof marking pen
-
Pro Tip: Choose marker colors that contrast with the panel backing for visibility
3. Bending Equipment
-
Manual folding tool (50kg capacity minimum)
-
Hydraulic press brake (0-1MPa adjustable pressure)
-
Safety Note: Always line bending surfaces with rubber padding to prevent surface damage
4. Support Tools
-
Sandpaper (80-grit for rough, 120-grit for fine finishing)
-
Isopropyl alcohol and lint-free cloths
-
G-clamps (100N clamping force)
-
Protective surface film (0.05mm thickness)
-
Important: Pad all clamp jaws to prevent surface marring
5. Specialized Equipment for Thick Panels
-
Temperature-controlled heat gun (0-300°C range)
-
Infrared thermometer (±2°C accuracy)
-
Critical: Use diffuser nozzles to prevent localized overheating
Material Selection: Choosing the Right ACP for Bending
Not all aluminum composite panels are created equal. For successful bending:
Quality Specifications:
-
Select panels specifically marked "bendable"
-
Verify front aluminum thickness ≥0.25mm
-
Prefer 3-4mm total thickness for most applications
Core Material Check:
-
Polyethylene core: Must be bubble-free and homogeneous
-
Fire-resistant core: Minimum B1 fire rating recommended
-
Avoid: Recycled core materials entirely
Surface Inspection:
-
Check for scratches, dents, or imperfections
-
Apply protective film before starting work
-
Application tip: Start from edges to prevent bubbles
The Professional Bending Process: Step-by-Step
Step 1: Precision Marking
-
Work on the panel's non-decorative side
-
Use engineering square for perfect straight lines
-
Maintain line width ≤1mm for accuracy
-
For production work: Create wooden guide templates
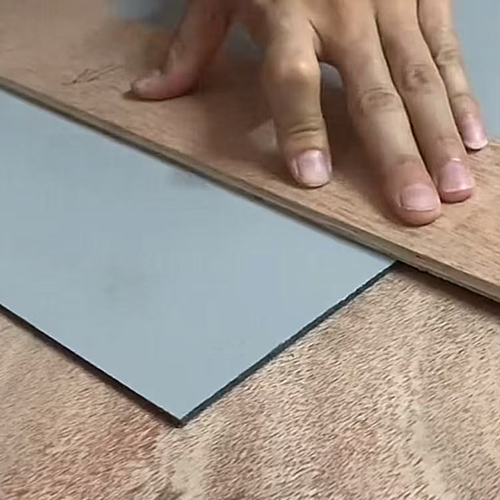
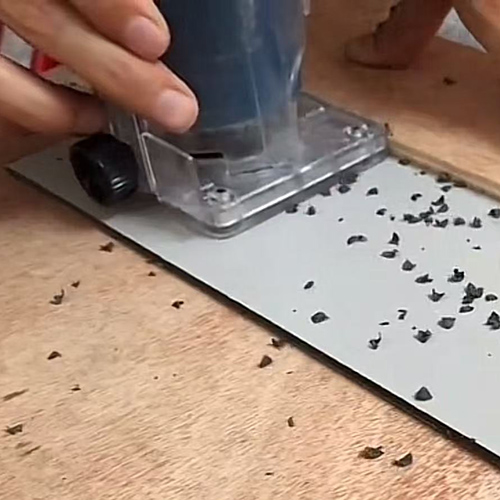
Step 2: Expert Grooving Technique
-
Depth calculation: Total thickness × 2/3 (Example: 3mm panel = 2mm depth)
-
Speed control: Maintain steady 3-5cm/s feed rate
-
Quality check: Run fingertip along groove—should feel smooth
-
Light test: Hold to light—no visible light through groove bottom indicates intact face layer
Step 3: Surface Preparation
-
Deburr with 80-grit followed by 120-grit sandpaper
-
Clean with alcohol (5cm area around groove)
-
Allow 1-2 minutes drying time
Step 4: Controlled Bending Sequence
-
Align groove with brake press edge (≤0.3mm tolerance)
-
Pressure settings:
-
3mm panels: 0.1MPa initial pressure
-
4mm panels: 0.2MPa initial pressure
-
-
Bend to 5° short of target angle, hold 30 seconds
-
Adjust to final angle, maintain pressure 1 minute
-
Check with angle gauge (≤1° tolerance acceptable)
-

Step 5: Final Setting
-
Space G-clamps 10-15cm apart along bend
-
Clamping force:
-
3mm panels: Approximately 50N
-
4mm panels: Approximately 80N
-
-
Rest on flat surface for 2 hours minimum
-
Ideal environment: 15-25°C, stable conditions
| Professional Parameter Reference Chart | |||||
| ACP Thickness | Bend Angle | Groove Depth | Bending Pressure | Min. Radius | Application Notes |
| 3mm | 90°C | 2.0-2.2mm | 0.2 MPa | 6mm | Indoor applications |
| 3mm | 135°C | 1.8-2.0mm | 0.15 MPa | 10mm | Low-stress bends |
| 4mm | 90°C | 2.7-3.0mm | 0.3 MPa | 8mm | Exterior cladding |
| 4mm | 135°C | 2.5-2.7mm | 0.25 MPa | 15mm | Extended hold recommended |
| 5mm | 90°C | 3.5-4.0mm | 0.4 MPa | 10mm | Heat assistance required |
Advanced Techniques for Special Applications
Thick Panel Bending (≥5mm)
-
Increase groove depth to 3/4 total thickness
-
Apply heat (60-70°C) along groove line for 30 seconds
-
Complete bending within 30 seconds of heating
-
Increase pressure by 20% over standard values
-
Extend setting time to 4 hours
Curved Bending (Radius ≥150mm)
-
Use roller bending equipment (no grooving required)
-
Three-stage progressive rolling:
-
Stage 1: 0.1MPa to 1/3 curvature
-
Stage 2: 0.15MPa to 2/3 curvature
-
Stage 3: 0.2MPa to final curvature
-
-
Check with template (≤2mm deviation acceptable)
Quality Control & Troubleshooting
Common Issues and Solutions:
-
Shallow grooving: Re-groove 3mm from original line
-
Deep grooving: Panel must be replaced—cannot be repaired
-
Face layer cracking: Light sanding and touch-up with aluminum paint
-
Core exposure: Seal within 24 hours with color-matched silicone
Environmental Considerations:
-
Humidity >85%: Postpone work (core absorbs moisture)
-
Temperature <5°C: Pre-warm panels to 15°C before working
-
Storage: Keep panels flat and supported
Expert Tips for Perfect Results
-
Tool Maintenance
-
Calibrate pressure sensors annually
-
Replace V-groove bits after visible wear
-
Keep all measuring tools clean and accurate
-
-
Process Optimization
-
Check groove depth every 50cm
-
Never use single-handed bending pressure
-
Allow proper curing time before handling
-
-
Long-Term Durability
-
Always seal exposed core material
-
Use UV-resistant silicone for exterior applications
-
Maintain minimum bend radii to prevent stress cracking
-